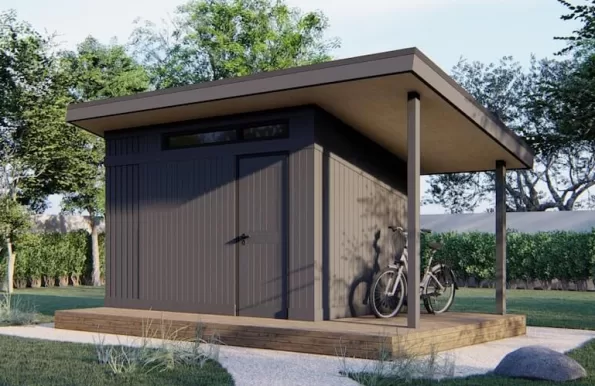
The Ultimate Guide to Green Shed Gardening: 5 Comprehensive Projects for World Environment Day

World Environment Day arrives on 5 June, giving us the perfect excuse to look at our favourite garden structures with fresh eyes. As sheddies, we spend hours tweaking, organising, and enjoying our outbuildings. But have you ever considered the environmental footprint of your backyard sanctuary?
Sheds are uniquely positioned to become powerhouse eco-hubs. Whether you use yours as a workshop, a home office, or a simple potting retreat, minor adjustments can significantly benefit local biodiversity and reduce your environmental impact.
Below, we take an in-depth, comprehensive look at five transformative projects that will turn your humble shed into a sustainable sanctuary.
1. Advanced Rainwater Harvesting & Greywater Systems
The roof of an average garden shed is a massive, untapped catchment area. Collecting rainwater reduces your reliance on treated mains water, which is better for your water bill and vastly superior for your plants, as rainwater lacks harsh treatment chemicals like chlorine and fluoride.
The Science of Catchment
To understand the impact of harvesting, consider the basic formula for rainfall collection: 1 mm of rain falling on 1 square metre of roof yields roughly 1 litre of water. If you own a standard 8ft x 6ft shed, your roof surface area is approximately 4.5 square metres. In areas of the UK receiving an average of 800 mm of rain annually, a single small shed can harvest over 3,600 litres of water every year.
Mains tap water undergoes intensive chemical processing and mechanical pumping, contributing heavily to municipal carbon footprints. By using ambient rainfall instead, you provide your garden with water at the ideal pH for soil microbiology, ensuring delicate ericaceous plants like blueberries and rhododendrons thrive.

Step-by-Step Installation & Optimisation
- Gutter Alignment: Mount lightweight PVC or metal mini-gutters along the eaves. Ensure a subtle downward slope of roughly 5 mm for every metre of run toward the downpipe to prevent stagnant pooling.
- The Diverter Valve: Cut into the existing downpipe and install a rain diverter kit. The diverter works via gravity and surface tension, allowing water to flow into your storage tank until full, at which point the excess bypasses the tank and flows safely down the drainage pipe to prevent flooding.
- Tank Setup: Situate your water butt on a level, solid foundation, such as paving slabs or a dedicated heavy-duty plastic stand. Elevating the tank is essential to clear space for a watering can beneath the tap.
- Maintenance Infrastructure: Fit a fine mesh debris guard or leaf screen over the gutter mouth. This keeps organic matter from rotting inside your storage tank, which preserves water clarity and prevents foul odours.
Linking Multiple Tanks
For serious gardeners, a single 200-litre water butt will empty rapidly during a dry spell in July or August. You can link multiple barrels in series using simple overflow kits. Drill a hole near the top of the first barrel and connect it to the top of the second barrel using a flexible rubber hose. When the first barrel fills to maximum capacity, gravity forces the excess clean water into the next reservoir, effectively doubling or tripling your storage infrastructure without requiring complex plumbing.
2. The Engineering & Ecology of Living Green Roofs
If your shed has a sturdy, flat, or gently sloping roof, transforming it into a living roof is a phenomenal way to insulate the structure naturally while providing a lifeline for local pollinators. It keeps your shed cooler in the summer, warmer in the winter, and acts as a biological filter for rainwater.
Structural Integrity & Weight Calculation
Before adding a single grain of soil to your roof, you must understand the load limitations of your timber structure. A standard mineral felt roof carries minimal weight. A living green roof, when completely saturated with winter rainwater, can weigh anywhere from 60 kg to 150 kg per square metre depending on the depth of the growing substrate.
For standard timber sheds, an extensive green roof is the only safe option. This utilises a shallow soil depth of 50 mm to 100 mm and relies on lightweight, drought-tolerant vegetation. If your shed uses lightweight 2×3-inch roof joists without central support, you will need to reinforce the internal ceiling structure with additional timber beams or vertical support posts before proceeding.

Layering Protocols for Success
A successful green roof relies on a precise sequence of synthetic and organic layers to protect your shed while nourishing the vegetation:
- The Waterproof Base: Remove old, degraded felt and lay a heavy-duty, single-sheet EPDM rubber membrane across the entire roof deck, securing it over the edges.
- The Root Barrier: Lay a thick sheet of polyethylene directly over the rubber to prevent aggressive plant roots from penetrating the structural timber over time.
- Drainage Layer: Install a dimpled plastic drainage matting. This clever material traps a small reservoir of water in its cups to sustain the plants during dry spells, while allowing excess storm water to flow freely underneath toward the gutters.
- Filter Fleece: Lay a permeable geotextile fabric over the drainage mat. This acts as a sieve, keeping fine soil particles within the growing medium while letting clean water pass through.
Substrate Composition & Plant Selection
Never use standard garden soil or generic multi-purpose compost on a green roof. Regular soil is far too heavy when wet, impacts tightly over time, and lacks proper drainage. Instead, mix a custom substrate comprising 60% lightweight aggregate (such as expanded clay pellets, crushed brick, or perlite), 20% sand, and 20% organic compost.
For vegetation, select hardy varieties that survive harsh sun, high winds, and periods of drought. Sedum varieties (such as Sedum album and Sedum acre) are ideal because their succulent leaves store water efficiently. Combine these with native British wildflowers like Bird’s-foot Trefoil, Wild Thyme, and Toadflax to turn your roof into a thriving buffet for bees.
3. Micro-Habitats & Vertical Insect Wall Architecture
You do not need to give up internal storage space to help local wildlife. The exterior walls of your shed, particularly those shielded from direct wind, are the perfect canvas for a vertical insect hotel. This creates immediate nesting sites for solitary bees, ladybirds, and lacewings, all of which act as natural pest controllers for your garden.
Biological Architecture
Different beneficial insects require highly specific nesting environments. A generic box stuffed with random twigs will only attract a narrow selection of species. To build a highly functional, multi-species habitat, you must cater to specific biological needs:
Target Species Preferred Material Ideal Placement Solitary Bees Drilled hardwood blocks, hollow bamboo canes Full sun, south or east-facing wall, 1–2m high Ladybirds & Lacewings Packed pinecones, dry straw, rolled corrugated cardboard Sheltered, damp, semi-shaded positions Beetles & Centipedes Rotting logs, damp bark pieces, old clay pipes Base of the wall, touching the ground
Construction & Material Sourcing
Begin by constructing a robust outer framework using untreated, rough-sawn timber scraps or a reclaimed wooden pallet. Avoid using treated timber or tantalised wood, as the chemical preservatives volatilise in summer heat and repel or harm the very insects you want to host.
When preparing wood blocks for solitary bees, select seasoned hardwoods like oak, ash, or beech rather than softwoods, which tend to splinter when drilled. Drill holes ranging from 2 mm to 10 mm in diameter, spaced roughly 20 mm apart. Ensure the holes are drilled deep into the wood (up to 150 mm) but do not penetrate all the way through the back panel. Solitary bees require a dead-end tunnel to lay their eggs safely. Use a fine sandpaper to smooth down the entrance holes perfectly; any rough splinters can easily tear a bee’s delicate wings as it enters.
Safeguarding the Habitat
To prevent local birds like woodpeckers and tits from turning your new insect hotel into an easy morning buffet, stretch a layer of 25 mm wire chicken mesh across the front of the wooden framework. Secure it firmly with staples. This creates a physical barrier that allows tiny insects to slip through effortlessly while keeping larger predators at bay. Ensure the entire structure tilts slightly downward so driving rain cannot accumulate inside the nesting tubes.
4. Off-Grid Photovoltaic Engineering for Sheds
If you use your shed for basic lighting or charging power tools, running an underground mains cable is often unnecessary and costly. A small, self-installed solar panel kit on a south-facing section of the roof can easily power a set of internal LED lights and a USB charging station. It isolates your garden energy usage from the grid entirely, utilizing clean, renewable energy.
Calculating Your Electrical Load
To select the correct solar components, you must determine exactly how much energy your shed will consume. Add up the wattage of every device you plan to use and multiply it by the number of hours they will run.
Example Daily Winter Consumption Calculation:
- 2x 5-watt LED internal strip lights running for 3 hours: 30 watt-hours (Wh)
- 1x Laptop charger (45 watts) running for 2 hours: 90 watt-hours (Wh)
Total Daily Load Requirement = 120 Wh
To safely cover a 120 Wh daily load in the UK, where winter daylight is limited, a 100-watt monocrystalline solar panel is the ideal entry point. This provides ample headroom during overcast days and generates an abundance of surplus power throughout the bright summer months.
System Architecture & Components
An off-grid solar system requires four distinct components working in harmony:
- The Solar Panel: Captures sunlight and generates direct current (DC) electricity.
- The Charge Controller: Acts as the brain of the system. It regulates the incoming voltage from the panel to prevent overcharging and damaging your battery storage. A 10A PWM (Pulse Width Modulation) controller is perfect for simple setups, though an MPPT (Maximum Power Point Tracking) controller is up to 30% more efficient in overcast British weather.
- The Battery Bank: Stores the generated energy for use after dark. Avoid standard automotive starter batteries, which degrade rapidly if deeply discharged. Instead, invest in a sealed Deep-Cycle AGM or Lithium Iron Phosphate ($LiFePO_4$) battery designed to handle continuous drain and recharge cycles.
- The Inverter (Optional): Converts the stored 12V DC power into 230V alternating current (AC) power, allowing you to plug in standard household three-pin appliances. If you only require lighting and phone charging, you can bypass an inverter entirely and use highly efficient native 12V DC LED lights and USB ports wired directly into the charge controller.
Safety & Cable Management
Always use dedicated, double-insulated solar cables UV-rated to withstand exterior weathering. Install an inline fuse between the positive battery terminal and the charge controller to protect the system against unexpected electrical shorts. Mount your battery and charge controller inside a ventilated wooden box or on a dedicated shelf away from direct moisture, dust, or flammable materials.
5. Chemistry & Application of Eco-Friendly Timber Preservatives
Maintenance is part of sheddie life, but the products we use matter. Traditional solvent-based wood stains can release volatile organic compounds (VOCs) into the environment. When it comes time to refresh your timber defenses this summer, switch to water-based, plant-oil-based, or traditional linseed stains.
The Problem with Traditional Solvent Coatings
For decades, heavy-duty solvent stains were the gold standard for shed preservation. These formulas rely on volatile petroleum solvents to carry biocides deep into timber fibers. As the coating cures, these solvents evaporate, releasing high volumes of VOCs into your garden ecosystem.
These compounds contribute to low-level ozone pollution, irritate human respiratory pathways, and pose long-term toxicity risks to garden soil biology when rainwater runoff carries micro-particles off the walls over time.
The Green Chemistry Revolution
Modern eco-friendly wood stains rely on clever water-borne acrylic chemistry or natural plant oils to achieve long-lasting exterior protection without harmful off-gassing:
- Water-Based Acrylic Stains: These formulas use water as the carrier medium. As the water evaporates, the acrylic resins cross-link to form a highly flexible, breathable barrier. This barrier allows internal moisture to escape the timber while blocking external rain, preventing peeling and cracking.
- Linseed & Tung Oils: Traditional, natural oils penetrate deep into the timber pores, curing via oxidation to create a rich, water-repellent barrier from within. They are completely non-toxic, safe for surrounding plants, and naturally biodegradable.
Professional Preparation & Application Technique
To get maximum longevity out of an eco-friendly coating, your preparation must be meticulous. Water-based formulas cannot adhere to oily or greasy surfaces left behind by old solvent treatments.
- Surface Stripping: Use a stiff wire brush or a scraper to remove any loose, flaking paint or degraded timber fibers.
- Sanding: Lightly sand the entire surface with 120-grit paper to open up the timber grain, allowing the new eco-friendly formula to penetrate deeply.
- Fungal Treatment: If you notice black mold spots or green algae, wash the timber down with a diluted solution of natural white vinegar and water rather than harsh chemical bleach. Allow the timber to dry completely for a clear 48 hours.
- Application: Apply the eco-friendly stain using a high-quality synthetic filament brush, which handles water-based coatings much better than natural bristle brushes. Work along the direction of the timber grain, applying two to three thin coats rather than one thick layer. This builds an incredibly resilient, long-lasting weather shield that protects your shed safely for years to come.
Disclosure: This post may contain affiliate links. If you make a purchase via these links, shedblog.co.uk may earn a small commission at no extra cost to you.
Useful Links
- Your shed-related Company here: like an old-school Blogroll
- Allotment sheds
- Gym shed
- Watch Horror Movies in your shed
- Looking for a Solo Cruise
- Build your own shipping container home
- Powering the UK Garden Shed
- Become Self Sufficient on ¼ Acre
- ProstaVive – Powerhouse Prostate Offer
- Health & Fitness/Men’s Health
- Buy Barndominium Plans
- TedsWoodworking – Best Woodworking Site On The Internet
- How To Setup A Fully Equipped Small Woodworking Shop
- The Ultimate How-To Guide to Building a Tiny House
Support us via Paypal or Buy me a Coffee