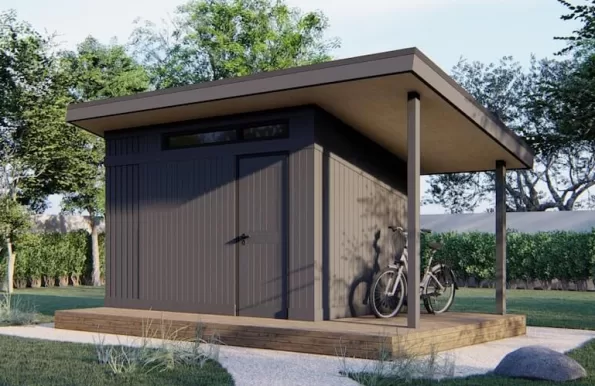
DIY Solar Revolution: A Complete Step-by-Step Guide to a Combined Shed and Solar Fence System

If you think plug-in solar is the limit for backyard green energy, it is time to think bigger. A brilliant new video by YouTuber MIKEBOLT showcases a massive upgrade to standard garden setups: a fully integrated, grid-tied solar system combining shed-roof panels and a highly aesthetic solar boundary fence.
By utilising microinverters, a smart automation relay, and a specialised battery backup, this design stops excess energy from being wasted back to the grid, saving it for evening use instead.
Here is the complete, comprehensive guide to replicating this ultimate DIY solar powerhouse in your own garden.
The System Architecture
Before drilling any holes, it helps to understand how this hybrid system routes power.
- Generation: Multiple DC solar panels split across two locations: the shed roof and the garden fence line.
- Conversion: Individual EcoFlow microinverters mounted inside the shed convert the DC power into AC household electricity right at the source.
- Transmission: Heavy-duty Steel Wire Armoured (SWA) cabling routed through underground conduit channels the AC power from the shed straight to the house.
- Monitoring & Storage: A secondary sub-panel inside the house utilises a Shelly Pro smart monitor. This device reads household demand via current clamps and communicates directly with a DJI 2000 grid-tied portable power station, charging the battery with excess solar during peak sun and discharging it back into the home when the sun goes down.
Step-by-Step Installation Guide
Step 1: Mounting the Shed Roof Panels
The build kicks off on top of the shed. When handling large solar panels, remember they are incredibly awkward and heavy, so always get a second pair of hands to help lift them onto the roof structure.
- Drill Mounting Holes: Clear the workspace inside the shed. Drill four holes clean through the shed roof material, spacing them to align with the pre-drilled mounting slots on the underside of your solar panel frames.
Top Tip: Check your spacing carefully from the inside first. Avoid nicking your structural roof joists with the drill bit.
- Seal and Bolt: Apply a generous amount of waterproof silicone sealant directly over and into the drilled holes to guarantee a leak-proof seal. Drop heavy-duty bolts equipped with washers straight through the panel frame and the roof holes.
- Secure from Inside: On the inside of the shed, thread a washer and a nut onto each protruding bolt. Tighten securely with a wrench.
- Create Corner Wedges: To prevent wind lift from pulling the bolts through the thin roof skin, cut 4-inch structural wood block wedges. Wedge these underneath the roof deck at all four corners of the panel footprint and secure them tightly to the joists using long wood screws.
Step 2: Creating the Solar Boundary Fence
Why leave your boundary fence bare when it can generate clean electricity? Mounting panels vertically or at a steep angle on a south- or west-facing fence is an ingenious use of space.
- Install Base Battens: Screw heavy-duty wooden support battens horizontally along the bottom length of your fence structure. These act as a temporary structural ledger to rest the heavy panels on while you level and secure them.
- Mark Rails and Brackets: Rest the solar panel on the ledger batten. Mark out the exact locations of your horizontal fence rails onto the panel’s aluminium frame using a marker pen.
- Drill and Tap the Frames: Remove the panel. Place a scrap piece of timber behind the frame flange to protect the delicate glass backing of the solar panel. Drill out your marking holes, then use a metal tap tool to thread the holes cleanly.
- Attach Brackets: Secure heavy-duty mounting brackets onto the threaded frame holes using washers, bolts, and a ratchet wrench.
- Fix to Fence: Lift the panels back onto the ledger batten, align the brackets with the solid fence rails, and drive heavy-duty outdoor wood screws straight through the brackets into the timber framework.
- Add Aesthetic Timber Framing: To hide the metal brackets and give the installation a premium, built-in appearance, cut timber trim boards to size, coat them with outdoor weatherproofing paint, countersink the screw holes, and frame the perimeter of the panels.
Step 3: Digging the Cable Trench and Pulling Conduit
To link the high-power system safely back to your property, you need a dedicated underground utility run.
- Excavate the Route: Mark a line from the shed, along the fence perimeter, underneath any gates, and up to the side entry point of the house. Dig out the soil along this path.
Note: If your run is longer than 20 metres, save your back and hire a mini-digger for a morning rather than attempting it with a manual spade.
- Lay Twin-Walled Conduit: Lay out high-durability, twin-walled flexible conduit along the bottom of the entire trench length to shield your electrical cables from future garden tool strikes or shifting soil.
- The Vacuum Trick for Lost Pull-Wires: If you accidentally cut your conduit or lose the internal pull-string, do not panic. Take a tiny piece of lightweight sponge, tie a length of high-strength fishing line to it, and stuff it into one end of the conduit pipe. Go to the far end of the pipe with a workshop vacuum cleaner, seal the nozzle over the opening, and turn it on. The suction will pull the sponge and fishing line clean through the pipe in seconds.
- Pull the Cable: Use the fishing line to pull a stronger pilot wire through the run. Secure that pilot wire tightly to your heavy electrical cables, such as two 4-core 1.5mm Steel Wire Armoured (SWA) cables for the main power loops, along with a secondary 4mm SWA cable to future-proof the shed for standard mains power tool use. Pull them steadily through from the opposite end. Applying a small amount of line chalk or cable lubricant to the jacket can significantly reduce friction inside long conduit runs.
Step 4: Making Off and Routing Solar DC Cables
With the structural paths set, it is time to manage the high-voltage DC lines running from the fence back into the central hub inside the shed.
- Measure and Cut: Pace out the exact distance from your individual fence panels, down the trench line, and into the rear entry of the shed. Reel off your premium UV-rated DC solar cable from the drum and cut to length.
- Crimp waterproof MC4 connectors: Using a dedicated solar crimping tool kit, strip back the cable insulation. Insert the metal terminal pins, crimp them firmly onto the copper core, and push the pinned wire into the waterproof MC4 connector housing. Make sure male inserts match female housings where required. Tighten the compression gland nuts firmly with solar spanners to ensure a completely weather-resistant, IP67-rated seal.
- Label Everything: Use heat-shrink or heavy-duty insulation labels on both ends of every single DC line. Mark them clearly (like Fence 1, Fence 2, Roof Left) so you can identify lines instantly during final termination or troubleshooting.
- Route into the Shed: Install two 40mm rigid plastic waste pipes through the back wall of the shed to serve as neat, wide-bore entry sleeves for the incoming bundle of DC solar lines.
Step 5: Earthing and Bonding (The TT System Setup)
Safety is paramount with external structural solar arrays. This installation utilises a dedicated TT electrical earthing system to isolate the outdoor array from the main house earthing loop.
- Array Inter-Bonding: Link the aluminium frames of all fence panels and roof panels together using heavy-duty 6mm green-and-yellow earth bonding cable and serrated washers that bite through the anodised coating of the frames.
- Local Grounding Rods: Drive multiple copper-clad steel earth rods deep into the ground near the arrays to establish an independent path to earth. Secure the 6mm bonding lines tightly to these rods using heavy-duty grounding clamps.
- Trench Ground Wire: To further drop earth resistance across the entire TT network, unspool a long 6-gauge bare copper grounding wire directly into the bottom of the main cable trench before backfilling it with soil.
Step 6: Setting Up the Inverter Array inside the Shed
Inside the shed, the incoming DC power meets the EcoFlow microinverters to be converted to usable AC electricity.
- Prepare a Backing Board: Cut a solid piece of MDF or exterior-grade plywood to serve as a clean central mounting board on the shed wall.
- Create an Air Gap Heat Sink: Microinverters can become incredibly hot under full load, and mounting them flush against timber is a serious fire hazard. When screwing the inverters down to the backing board, slide stackable metal washers or spacers over the mounting screws behind the unit. This creates a mandatory air gap heat sink behind each inverter, keeping air circulating freely.
- Wire up the AC Outlets: Route the AC output lines from the inverters into heavy-duty WAGO junction boxes, linking the power seamlessly into the armoured cables heading back to the house through a dedicated 20mm galvanised conduit line.
Step 7: Final House Connection, Smart Monitoring, and Battery Storage
The garden build is complete; now the power must be integrated safely into your home’s electrical network.
- Drill the House Entryway: To pass your armoured conduit through the external house wall cleanly, drill a small 10mm pilot hole from the inside out first. This prevents the large drill bit from blowing out or cracking your external render. Once the pilot hole is clear, move outside and step up the drill bit sizes gradually (15mm, 20mm, then 22mm) before lining the opening with clean conduit.
- Install the Secondary Consumer Sub-Panel: Mount a dedicated sub-panel next to your home’s main consumer unit. Install individual Residual Current Breakers with Overcurrent protection (RCBOs) for each incoming inverter line to give each circuit its own independent safety trip.
- Wire the Smart Monitoring Relay: Install a Shelly Pro smart relay inside the sub-panel. Clamp its first current sensing loop around the live feed incoming from the garden solar array to track generation. Clamp the second sensing loop around the main incoming utility grid live tail to monitor whether the house is importing or exporting power overall.
- Integrate the Intelligent Battery Bank: Plug the house-side AC lines into a high-capacity DJI 2000 portable power station featuring grid-tied energy storage logic. Through local network integration, the Shelly Pro monitor talks directly to the DJI battery bank.
When the Shelly detects that your shed and fence panels are producing more power than your home is actively using, it tells the battery bank to absorb the surplus. When the sun goes down and household consumption outpaces solar generation, the battery smoothly discharges its stored green energy back into your home circuits, dropping your grid reliance down to near zero.
Spotlight on EcoFlow: The Tech Behind the Build
While the DIY build masterfully pieces together a bespoke power station and smart relay framework, it relies heavily on hardware from EcoFlow inside the shed to handle the continuous work of power conversion.
EcoFlow has quickly become a dominant name in the UK’s plug-in solar and micro-generation markets, largely because their gear bridges the gap between complicated commercial setups and plug-and-play simplicity. Here is a look at the specific EcoFlow tech family that drives systems like this one.
EcoFlow Microinverters (PowerStream & STREAM Series)
In this build, multiple individual EcoFlow microinverters are mounted inside the shed. EcoFlow offers two primary lines for this type of system layout:
- EcoFlow PowerStream: The unit that kicked off the compact hybrid microinverter trend. It handles up to 800W of AC output to your home and features a dual MPPT (Maximum Power Point Tracking) system. Crucially, it includes a dedicated battery port designed to integrate directly with their portable power stations.
- EcoFlow STREAM Series: Designed specifically with the UK plug-in solar market in mind, this ultra-slim, book-sized microinverter features a rugged, passively cooled, IP67 waterproof aluminium chassis. It starts up with as little as 3W of solar input, making it highly effective at pulling power during dim, low-light British winters, early mornings, or twilight hours.
Both inverter series feature automatic island detection and grid outage protection. If the main utility grid goes down for maintenance or a power cut, the inverters shut off their output instantly to prevent back-feeding live electricity down the street, keeping grid engineers completely safe.
The Ecosystem Advantage
What makes these microinverters a favourite for shed conversions is their flexibility. You can start with just a microinverter and a couple of panels, pushing power straight into your home to offset your baseline background electricity usage (like your broadband router and fridge).
When your budget allows, you can link them directly to EcoFlow’s LFP (Lithium Iron Phosphate) batteries (such as the Delta or River series) using their specialised direct-connect cabling. The native EcoFlow app handles the rest, allowing you to set smart rules so you can prioritise powering your household appliances during expensive peak hours and charging your battery storage banks when production outpaces your consumption.
You can also buy Ecoflow products from Currys
Disclosure: This post may contain affiliate links. If you make a purchase via these links, shedblog.co.uk may earn a small commission at no extra cost to you.
Useful Links
- Your shed-related Company here: like an old-school Blogroll
- Allotment sheds
- Gym shed
- Watch Horror Movies in your shed
- Looking for a Solo Cruise
- Build your own shipping container home
- Powering the UK Garden Shed
- Become Self Sufficient on ¼ Acre
- ProstaVive – Powerhouse Prostate Offer
- Health & Fitness/Men’s Health
- Buy Barndominium Plans
- TedsWoodworking – Best Woodworking Site On The Internet
- How To Setup A Fully Equipped Small Woodworking Shop
- The Ultimate How-To Guide to Building a Tiny House
Support us via Paypal or Buy me a Coffee