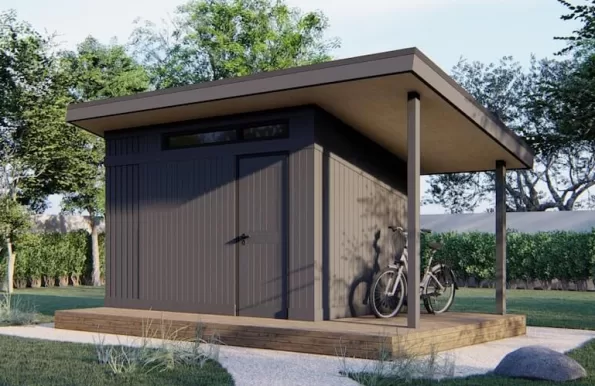
DIY Pallet Furniture- Transform Your Shed Studio

Your shed, once just a storage space, can become the heart of creativity and sustainable design. It’s a sanctuary where ideas take shape, where forgotten materials are given new life, and where the satisfaction of making something with your own hands is truly felt. This transformation is never more evident than when you embark on the rewarding journey of creating pallet furniture.
The creative reuse trend has captivated homeowners and designers alike, breathing new life into everything from old drawers repurposed as planters to vintage suitcases reborn as charming shelves. It’s a movement that champions sustainability, celebrates unique aesthetics, and proves that true design innovation often comes from seeing potential where others see discard. Among the most versatile and readily available materials for this upcycling revolution are humble wooden pallets. Transforming them into beautiful, functional furniture isn’t just a budget-friendly endeavor; it’s a powerful statement about conscious consumption and personalized style. And what better place to unleash this creativity than in the dedicated space of your own shed studio or workshop?
This blog post will guide you through everything you need to know about crafting stunning pallet furniture, from sourcing and safety to design and finishing, all from the comfort and convenience of your backyard creative haven. Get ready to turn discarded wood into cherished pieces and discover the immense satisfaction of sustainable design.
Why Pallets? The Unsung Hero of Upcycling
At first glance, a wooden pallet might seem like nothing more than a functional, if somewhat rough, industrial item. Yet, beneath its utilitarian exterior lies a treasure trove of potential for the savvy DIYer. Here’s why pallets are the ultimate material for your shed studio projects:
- Sustainability at its Core: Every pallet you reclaim and transform is one less item destined for a landfill. By choosing to upcycle, you actively participate in reducing waste and minimizing your environmental footprint. It’s a tangible way to practice sustainable living and contribute to a circular economy.
- Remarkably Cost-Effective: One of the most compelling reasons to use pallets is their price tag—often free! Businesses frequently discard them, making them a readily available and inexpensive resource. This allows you to experiment with designs and build substantial pieces without breaking the bank, leaving more budget for tools or high-quality finishes.
- Versatility in Design: Pallets are surprisingly adaptable. Their inherent modularity makes them ideal for creating a wide array of furniture, from sturdy outdoor sofas and rustic coffee tables to chic bookshelves and unique storage solutions. They can be stacked, disassembled, cut, and joined to suit almost any design vision, for both indoor and outdoor settings.
- Inherent Rustic Charm: There’s an undeniable character to aged, untreated wood. Pallets offer a raw, industrial, and distinctly rustic aesthetic that can be incredibly charming. Whether you embrace their natural imperfections or smooth them down for a more refined look, pallet wood brings a unique warmth and story to every piece.
- Accessibility: Pallets are everywhere. From construction sites and industrial parks to small businesses and even online marketplaces, opportunities to acquire them are abundant, making your creative material hunt straightforward.
Safety First: Sourcing and Preparing Your Pallets
Before you even pick up a saw, safety must be your absolute priority. Not all pallets are created equal, and some can pose health risks if not handled correctly.
- Sourcing Smart:
- Where to Look: Local businesses (especially those receiving large shipments like hardware stores, feed stores, or even smaller retail outlets) are excellent sources. Industrial parks often have them, but always ask permission before taking any. Online marketplaces (Facebook Marketplace, Craigslist) are also good places to find free pallets.
- What to Avoid: Steer clear of pallets found near chemical plants, construction waste, or in dumpsters. You never know what toxic substances they might have been exposed to or spilled on.
- Identifying Safe Pallets (Crucial!):
- Look for Markings: Pallets are typically stamped with codes that indicate how they were treated. ALWAYS look for the “HT” (Heat Treated) stamp. These pallets have been kiln-dried to eliminate pests and are generally safe for indoor and outdoor use.
- AVOID “MB” (Methyl Bromide) stamped pallets. Methyl bromide is a highly toxic pesticide, and these pallets should never be used for furniture, especially anything that will be indoors or in contact with food.
- IPPC Logo: Most international pallets will also bear the IPPC (International Plant Protection Convention) logo, which signifies compliance with international standards.
- No Stamp? Proceed with Caution: If a pallet has no stamp, it’s best to err on the side of caution and avoid it, or use it only for outdoor, non-contact projects like garden compost bins.
- Thorough Inspection:
- Once you have an “HT” stamped pallet, examine it closely. Look for signs of excessive wear, rot, mold, insect infestation, or major cracks.
- Check for any lingering chemical stains, oil spills, or strong odors. If anything seems off, discard it.
- Remove any loose nails or staples immediately.
- Deep Cleaning:
- Pallets can be dirty from their travels. Begin by scrubbing them with a stiff brush and a solution of warm water and mild soap (like dish soap or an eco-friendly cleaner).
- For stubborn dirt or mold, a pressure washer can work wonders, but be careful not to damage the wood.
- Rinse thoroughly and allow the pallets to dry completely in the sun for several days. This prevents rot and ensures any finishes you apply will adhere properly.
- Disassembly (If Needed): Many projects require individual pallet planks. Disassembling pallets can be tricky, as the nails are often spiral-shanked and deeply embedded.
- Tools: A reciprocating saw with a metal-cutting blade is highly effective for cutting through nails between the planks and stringers. A pry bar, hammer, and a pallet buster tool (specifically designed for this task) are also invaluable.
- Technique: Work carefully, applying steady pressure. Try to preserve the integrity of the planks as much as possible.
Equipping Your Shed Studio: Tools for the Trade
Your shed studio isn’t just a space; it’s a dedicated environment for creation. Equipping it properly will make your pallet furniture journey safer, easier, and more enjoyable.
- The Essentials (Hand Tools):
- Measuring Tape & Pencil: For accurate measurements and markings.
- Clamps: Indispensable for holding pieces together during gluing, screwing, or cutting.
- Hammer & Pry Bar: For pallet disassembly and general assembly.
- Orbital Sander & Sandpaper (various grits): Absolute necessity for smoothing rough pallet wood and preventing splinters.
- Wood Glue: For strong, durable joints.
- Safety Glasses, Gloves, Dust Mask/Respirator: Non-negotiable for personal protection against splinters, dust, and fumes.
- Power Tools (Highly Recommended for Efficiency):
- Circular Saw or Jigsaw: For making precise cuts to planks. A circular saw is great for straight cuts, while a jigsaw is useful for curves or intricate shapes.
- Drill/Driver: Essential for pre-drilling pilot holes (to prevent wood splitting) and driving screws.
- Reciprocating Saw: A lifesaver for quickly disassembling stubborn pallets by cutting through nails.
- Power Sander (Orbital or Belt Sander): Speeds up the sanding process significantly, crucial for large projects.
- Finishing Supplies:
- Wood Filler: To fill gaps, holes, or imperfections.
- Stains, Paints, Sealants/Varnishes: To protect and beautify your finished piece. Choose exterior-grade finishes for outdoor furniture.
- Brushes, Rollers, Rags: For applying finishes.
- Optimizing Your Shed Workshop:
- Lighting: Good lighting is paramount. Supplement natural light with LED shop lights or task lighting over your workbench.
- Ventilation: Working with wood, especially sanding and applying finishes, generates dust and fumes. Ensure good airflow with open windows, a fan, or even an exhaust fan.
- Sturdy Workbench: A solid, stable workbench is fundamental for safety and precision.
- Organization: Keep tools organized and accessible. Pegboards, shelves, and tool chests will make your workflow smoother and prevent lost items.
Designing Your Dream Pallet Pieces
The beauty of pallet furniture lies in its adaptability. Before you start cutting, take some time to plan and design.
- Gather Inspiration: Explore Pinterest, Instagram, design blogs, and furniture catalogs. Save images of styles you like, paying attention to how pallets are used.
- Plan with Purpose:
- Functionality: What purpose will the piece serve? Is it for seating, storage, display?
- Space: Measure the area where the furniture will go. This will dictate the dimensions of your project.
- Sketch It Out: Draw simple sketches from different angles. This helps visualize the final product and identify potential challenges.
- Embrace Modularity: Pallets are inherently modular. Consider how you can stack full or half pallets to create bases, arms, or backrests. This often simplifies construction.
- Start Simple: If you’re new to woodworking, begin with a straightforward project like a coffee table or a simple planter box. Building confidence with basic cuts and joins will set you up for more complex designs.
- Estimate Materials: Based on your design, calculate how many pallets you’ll need, both for their full form and for individual planks.
Project Showcase: From Pallets to Masterpieces
Let’s dive into a couple of popular and rewarding pallet furniture projects perfect for your shed studio.
Project 1: The Rustic Pallet Coffee Table
A pallet coffee table is an excellent beginner project that offers immediate gratification and a stylish focal point for any living room or outdoor space.
Materials:
- 2-3 clean, “HT” stamped pallets
- Wood screws (2.5-3 inches, exterior grade if for outdoor use)
- Optional: 4 heavy-duty swivel casters with brakes
- Optional: Sheet of tempered glass for the top
- Wood glue
- Sandpaper (various grits), wood filler
- Finish (stain, paint, or clear sealant)
Steps:
- Preparation: Thoroughly clean and inspect your pallets. If needed, fill any large gaps or holes with wood filler and allow it to dry.
- Sanding: This is crucial. Use an orbital sander to smooth all surfaces, starting with 80-grit sandpaper and progressing to 120- or 150-grit. Pay special attention to edges and areas where hands will frequently touch to eliminate splinters.
- Assembly (Basic): Stack two pallets directly on top of each other. Align them perfectly. Apply a generous bead of wood glue between the top and bottom pallet.
- Securing: Drive long wood screws through the top pallet into the stringers (the thicker support beams) of the bottom pallet. Use at least 4-6 screws per side for stability.
- Adding Casters (Optional): If you want a mobile table, flip the assembled pallets over. Attach the casters to the four corners of the bottom pallet’s stringers using appropriate screws. Ensure they are securely fastened.
- Finishing: Apply your chosen finish. A dark stain can enhance the rustic look, while a pop of color paint can give it a modern edge. For protection, especially if outdoors, apply several coats of a clear, durable sealant.
- Glass Top (Optional): Once the finish is dry, place a custom-cut tempered glass top (you can get this from a local glass shop) on the table. This creates a smooth, easy-to-clean surface and showcases the pallet’s structure.
Project 2: The Outdoor Pallet Lounge Sofa
Create a comfortable and stylish outdoor seating area perfect for relaxing on your patio or in your garden.
Materials:
- 6-8 clean, “HT” stamped pallets (quantity depends on desired length)
- Outdoor-rated wood screws (2.5-3 inches)
- Wood glue
- Exterior-grade wood filler, sandpaper (various grits)
- Exterior paint or weather-resistant stain/sealant
- Comfortable outdoor cushions
Steps:
- Preparation: Clean and thoroughly sand all pallets. Since this will be seating, extra attention to smoothing surfaces and edges is vital. Fill any major gaps or imperfections.
- Base Construction: Determine the length of your sofa. For a standard two-seater, you might use two full pallets side-by-side for the base. For a deeper seat, you might stack two pallets on top of each other for the base, just like the coffee table. Secure them with wood glue and screws.
- Backrest Assembly: Stand a pallet vertically against the back edge of your base. This will form the backrest. Use strong screws driven at an angle through the bottom of the backrest pallet into the base pallet’s stringers. For added stability, you might want to attach vertical support beams (made from pallet planks or other wood) to the back of the base and the backrest.
- Armrests (Optional): If desired, stand half-pallets or sections of pallets on their ends at either side of the base to create armrests. Secure them firmly with glue and screws.
- Extensive Sanding & Finishing: As this piece will be in direct contact with skin, sanding to a very smooth finish is paramount. Once sanded, apply multiple coats of an exterior-grade paint or sealant to protect the wood from the elements. Lightly sand between coats for a smooth finish.
- Cushions: Once dry, add comfortable, weather-resistant outdoor cushions. These instantly transform the raw pallet structure into inviting lounge seating.
Mastering the Craft: Techniques and Finishing Touches
Achieving professional-looking pallet furniture involves more than just assembly.
- Disassembly Nuances: When taking pallets apart, patience is key. If using a pry bar, work slowly, wiggling the wood to loosen the nails rather than forcing them, which can split the planks. A claw hammer or nail puller is great for removing stubborn nails once the planks are separated.
- Sanding Secrets: Don’t underestimate the power of sanding. It’s not just about aesthetics; it’s about safety (no splinters!) and preparing the wood for a proper finish. Start with a coarser grit (e.g., 60 or 80) for rough surfaces and move to finer grits (120, 150, or even 220) for a smooth, touchable finish. Always sand with the grain of the wood.
- Cutting Precision: Measure twice, cut once! Use a straight edge or speed square to guide your saw for accurate cuts. Clamp your wood firmly to your workbench to prevent movement and ensure safety.
- Strong Joints: Wood glue is your best friend for strong, lasting joints. Apply it liberally to all mating surfaces before screwing or bolting. Use appropriate screws (e.g., deck screws for outdoor projects) and pre-drill pilot holes to prevent the wood from splitting, especially near edges.
- The Art of Finishing:
- Staining: Enhances the natural grain and adds depth of color. Apply evenly with a brush or rag, wiping off excess.
- Painting: Provides a solid color and can modernize the look. Use a primer first, especially on rough pallet wood, for better adhesion and a smoother finish.
- Sealing/Varnishing: Crucial for protection. A clear polyurethane or spar urethane (for outdoor use) will protect against moisture, UV rays, and wear. Apply multiple thin coats, lightly sanding between each.
Beyond Furniture: Maximizing Your Shed Workshop with Pallets
The versatility of pallets extends beyond just making furniture for your home. They can also be invaluable for enhancing your shed studio itself.
- Internal Storage Solutions: Pallet planks can be repurposed into sturdy shelves for tools, paint cans, or project materials. You can even create wall-mounted organizers or small cabinets within your shed.
- Work Surfaces: Disassembled pallet wood can form a rustic and robust top for an auxiliary workbench or a mobile cart, adding more functional space to your workshop.
- Aesthetic Touches: For a truly immersive creative environment, consider using pallet wood to clad an accent wall inside your shed, or even create unique flooring sections, adding to the rustic, upcycled charm of your workspace.
Conclusion
Your shed studio isn’t just a place to store tools; it’s a launchpad for creativity and a testament to the power of sustainable design. The journey of creating pallet furniture is incredibly rewarding, offering a unique blend of practicality, eco-consciousness, and personal expression. From the thrill of salvaging discarded wood to the satisfaction of seeing your design vision come to life, each step is an opportunity to learn, create, and contribute to a more sustainable world.
So, gather your tools, roll up your sleeves, and step into your shed. Let the rustic charm of pallets inspire you to craft beautiful, functional pieces that tell a story. Embrace the process, enjoy the transformation, and take pride in knowing that you’ve created something wonderful from what others might have overlooked. Unleash your inner maker and share your unique, upcycled creations with the world!
Disclosure: This post may contain affiliate links. If you make a purchase via these links, shedblog.co.uk may earn a small commission at no extra cost to you.
Useful Links
- Your shed-related Company here: like an old-school Blogroll
- Allotment sheds
- Gym shed
- Watch Horror Movies in your shed
- Looking for a Solo Cruise
- Build your own shipping container home
- Powering the UK Garden Shed
- Become Self Sufficient on ¼ Acre
- ProstaVive – Powerhouse Prostate Offer
- Health & Fitness/Men’s Health
- Buy Barndominium Plans
- TedsWoodworking – Best Woodworking Site On The Internet
- How To Setup A Fully Equipped Small Woodworking Shop
- The Ultimate How-To Guide to Building a Tiny House
Support us via Paypal or Buy me a Coffee