Catios vs. Sheds: Building a Safe Outdoor Space for Your Cats

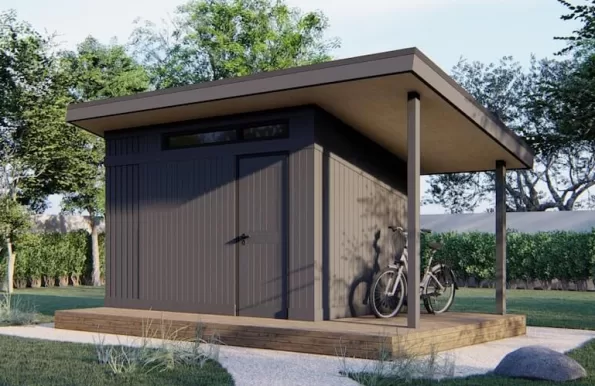
We’ve noticed a trend in our search traffic lately—a lot of our readers from the USA have been landing on our sister site while searching for “catios,” perhaps thinking our classic British garden sheds are exactly the same thing.
While a traditional timber shed is perfect for storing your tools, tinkering at a workbench, or just escaping down the garden path for a bit of peace, a catio (or “cat patio”) is a purpose-built enclosure designed strictly for feline friends. But, since we love any excuse to talk about timber framing and garden DIY, we couldn’t resist sharing a fantastic catio build.
Pre-built catios are amazing but can be eye-wateringly expensive, but building one yourself is a highly rewarding project. We recently spotted a superb video by Rag ‘n’ Bone Brown that shows you exactly how to build a bespoke, secure outdoor space on a 3.6m x 3m patio for two special indoor kitties, Reggie and Betsy.
It is a fantastic look at how to adapt a timber structure to a tight patio site, featuring brilliant weatherproofing tips alongside a classic framing mistake that every DIYer should learn from.
The Step-by-Step Construction Process
If you’re looking to pull out the exact mechanics of this build for your own garden project, here is how the assembly breaks down:
1.Timber Prep & ‘Deep Drink’ Preserving
Sometimes pressure-treated 3×2 timber often arrives soaking wet, it needs to air-dry for about three weeks. Once dry, cut the main wall plates and studs to size. To prevent rot down the line, let the freshly cut end-grains sit directly in a bucket of wood preserver for 10 minutes so the wood can drink it up thoroughly. Apply a spirit-based dark brown stain to all individual pieces before assembly.
2.Squaring and Protecting the Base
On-site, use the mortar lines of the existing patio pavers as a built-in reference line to keep the framing perfectly square. To stop the timber from wicking up standing rainwater, cut down small rubber pads to place underneath the bottom timber plates, creating a crucial air gap. Use plastic packers behind the frame where it attaches to the house brickwork for the exact same reason.
3.Framing the Walls
Build the wall frames flat on the patio floor. To keep things looking clean, carefully align the catio’s double doors visually with the house’s existing French doors. Once the frames are bolted together, add diagonal bracing to completely eliminate any structural wobble.
4.Mesh Application & Security
Instead of using thin chicken wire, opt for heavy-duty 16-gauge, 1-inch square galvanised mesh. Add mid-rail noggins centred precisely where two sheets of mesh meet, and fix the wire down using galvanised washers and screws to clamp it tightly to the outside of the frame. Wrapping the mesh around corners in one continuous piece makes things incredibly secure.
5.Door Construction & Sag-Proofing:.
For the three entry doors, use polyurethane glue on the joints and add diagonal bracing running from the hinge side diagonally upwards to prevent the gates from sagging over time. Hang them using 300mm galvanised T-hinges.
6.Anchoring the Roof & Adding Slats:
Drive heavy-duty concrete screw bolts straight into the brickwork to mount a structural wall plate without needing wall plugs. Cut angled joists to create a sloped roof for drainage, using massive 150mm timber screws to tie everything into the wall frames. For shade, clad a section of the roof and one internal wall with 2×1 timber battens, using 15mm spacers to ensure uniform airflow and light gaps.
7.Overhead Mesh & Tensioning:
Roll out the mesh overhead and secure it to the underside of the joists. Run plastic-coated stainless steel tensioning wire across the roof to prevent the mesh from sagging over time. Finally, bind overlapping mesh sheets together with galvanised wire, seal joints with black silicone, and apply a final coat of stain.
The Assembly Trap: Framing Yourself into a Corner
While the finished catio looks incredible, the builder ran into a classic assembly trap during Stage 3 that nearly caused a disaster.
Because the catio sits flush against the house brickwork, it relies on the home’s wall to act as its fourth side. The builder constructed the first side wall and fixed it to the house perfectly. However, he erected the long front wall too early, before doing anything with the final side wall.
By standing the front wall up first, he boxed in his workspace. When he went to lift the final side wall into position, he realised he didn’t have enough clearance to rotate and lift the completed frame without it smashing into the other walls.
He was forced to build the final wall in mid-air, piece by piece. Because it wasn’t rigid yet, the timber framing was completely unstable and “flapping around all over the place”. He had to make a panicked phone call to the homeowner to come hold the wood while he frantically drove in the final screws.
How to avoid this: If you’re building a three-sided enclosure against a house, always build and raise your two side walls first. Then, assemble your front wall flat on the ground inside the footprint and lift it straight up vertically like a garage door into the gap. It won’t bind, and you won’t need to call for emergency backup!
The Costs Involved
If you’re wondering about the budget, doing it yourself is definitely the way to save money. Pre-made kits can cost thousands, but his total build came to £775, broken down as:
- £386 for timber
- £160 for a 30m roll of 16-gauge mesh (with plenty left over)
- £96 for wood preserver and dark brown stain
- £133 for hardware, latches, hinges, deck supports, and glue.
Whether you’re building a heavy-duty workshop or a safe haven for your cats, this project is packed with great framing, anchoring, and weatherproofing techniques. Check out the full video by Rag ‘n’ Bone Brown [http://www.youtube.com/watch?v=X_fNx2L5VSU] to watch the build in action!
Disclosure: This post may contain affiliate links. If you make a purchase via these links, shedblog.co.uk may earn a small commission at no extra cost to you.
Useful Links
- Your shed-related Company here: like an old-school Blogroll
- Allotment sheds
- Gym shed
- Watch Horror Movies in your shed
- Looking for a Solo Cruise
- Build your own shipping container home
- Powering the UK Garden Shed
- Become Self Sufficient on ¼ Acre
- ProstaVive – Powerhouse Prostate Offer
- Health & Fitness/Men’s Health
- Buy Barndominium Plans
- TedsWoodworking – Best Woodworking Site On The Internet
- How To Setup A Fully Equipped Small Woodworking Shop
- The Ultimate How-To Guide to Building a Tiny House
Support us via Paypal or Buy me a Coffee