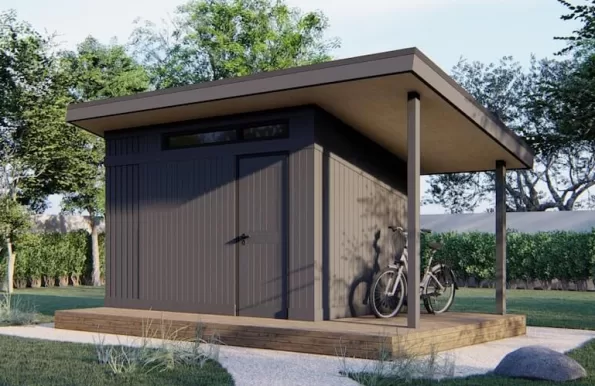
Adding a Tiny Real Ale Brewery to Your Pub Shed

For countless beer lovers across the UK, the humble garden shed has undergone a glorious transformation. No longer just a repository for rusty tools and forgotten bicycles, it has become a sanctuary, a social hub, a pub shed. The twinkling fairy lights, the mismatched bar stools, the personalised pump clips, the satisfying clink of glasses amongst friends – it’s a uniquely British slice of paradise. But what if you could elevate this haven to the next level? What if the amber nectar flowing from your taps wasn’t just carefully selected from local breweries, but lovingly crafted right there, within the very walls (or perhaps an extension) of your shed? Welcome to the ultimate pub shed dream: integrating your very own small-scale real ale brewery.
This isn’t about becoming the next BrewDog or Thornbridge (though who knows where passion might lead!). It’s about the deep satisfaction of creation, the unparalleled freshness of a pint pulled mere feet from where it was born, and the bragging rights that come with serving your own “Shed-brewed Special.” It’s a significant step, demanding planning, investment, and dedication, but the rewards – liquid gold and pure pride – are immense. Let’s delve into how you can turn this dream into a hoppy reality.
Why Bother? The Allure of the Shed-Brewed Pint
- Unbeatable Freshness & Quality Control: Imagine serving a pint of your best bitter that finished conditioning yesterday. You control every step: the malt bill, the hop varieties and timings, the yeast strain, the water chemistry (to an extent!), and crucially, the cellarmanship. No transport shocks, no extended storage – just peak-conditioned real ale.
- Ultimate Personalisation: Fancy a robust oatmeal stout? A sessionable golden ale bursting with local hedgerow berries? A traditional ESB with a unique hop twist? Your brewery, your rules. Experiment, refine, and create beers that perfectly match your taste and your pub shed’s ethos.
- The Pride Factor: There’s an indescribable joy in watching friends savour a pint you created from scratch. The conversations sparked, the feedback (constructive and otherwise!), the simple statement: “I brewed this.” It’s the heart of the craft brewing revolution, scaled down to your garden.
- Community & Storytelling: Your pub shed becomes more than a drinking hole; it becomes a brewery taproom in microcosm. Share the process, host brew days (safely!), involve regulars in naming beers. It adds a fascinating layer to the social experience.
- Potential Cost Savings (Long-Term): While the initial setup costs are substantial, brewing your own beer, especially for personal consumption within your shed, can work out significantly cheaper per pint than buying commercial casks or kegs over time. Think of it as an investment in liquid happiness.
The Crucial Foundation: Legalities and Regulations (Don’t Skip This!)
This is paramount. Brewing alcohol, even in small quantities for personal enjoyment within your private space, is regulated in the UK. Ignorance is not bliss; it can lead to hefty fines or worse.
- HMRC Registration (Excise Notice 226):This is non-negotiable.
- Personal Use Brewing: If you only brew for personal or family consumption on your own premises, and you brew less than: 1. 100 litres of beer per calendar quarter (approx. 175 pints), AND 2. 30 litres of spirits per year, AND 3. 70 litres of wine or cider per year… you do NOT need to register with HMRC or pay duty. Crucially, you cannot sell or give away any of this beer commercially or even to friends outside your immediate household consumption on your premises.
- Brewing Beyond Personal Use (The Pub Shed Scenario): The moment you intend to serve your beer to guests in your pub shed – even if they are friends and you aren’t explicitly charging per pint (though “donations” are a grey area!) – you are moving beyond strict “personal consumption.” HMRC views serving beer to guests in what is effectively a private bar as potentially exceeding the personal use allowance. You MUST register with HMRC as a brewer. This involves:
- Completing application forms.
- Undergoing suitability checks.
- Keeping detailed production records (quantities brewed, ingredients used).
- Paying duty on the beer you produce (there is a Small Brewers’ Relief scheme which significantly reduces duty for very small producers, which you would likely qualify for).
- Submitting regular returns.
- Allowing HMRC officers access for inspection.
- The Grey Area & Risk: Many pub shed owners serve homebrew informally without registering. However, this carries significant risk if discovered. Fines for evasion can be substantial. Registering is the legal and safe route, especially if your pub shed is a regular feature with multiple guests.
- Licensing (England & Wales – Scotland/NI differ slightly):
- Personal Consumption: No licence needed if purely for you/family within your home (including garden/shed).
- Serving to Guests (Pub Shed): This is where it gets complex. Technically, if you are “selling” alcohol (including via an honesty box, suggested donation, or membership fee that includes alcohol) or even regularly supplying it freely in a “bar-like” environment to non-household members, you may need a Premises Licence from your local council under the Licensing Act 2003. This involves:
- Demonstrating the “Licensing Objectives” (preventing crime/disorder, public safety, preventing nuisance, protecting children).
- Potentially needing a Designated Premises Supervisor (DPS) with a Personal Licence.
- Public consultation (neighbours notified).
- Fees and annual renewal costs.
- The “Private Party” Loophole (Use with Caution): Serving homebrew occasionally at genuine, invitation-only private parties (e.g., birthdays, family gatherings) within your dwelling (which often includes the garden/shed as part of the curtilage) is generally considered permissible without a licence. However, if your “pub shed” operates regularly (e.g., every Friday night, open to a wide circle), it starts looking more like an unlicensed bar, regardless of whether money changes hands. Councils and police have shut down such operations. Proceed with extreme caution and seek specific legal advice if unsure. The safest route for a regular pub shed serving your own brew is to investigate a Premises Licence.
- Health, Safety & Environmental Health:
- Food Hygiene: Even though you’re brewing beer, hygiene is critical. Contamination ruins batches. Surfaces must be cleanable. Consider basic food hygiene principles.
- Chemical Safety: Handling cleaning chemicals (CIP – Clean-in-Place), sanitisers (Star San, Iodophor), and potentially caustic soda requires care, storage, and PPE (gloves, goggles).
- Gas Safety: If using gas burners for heating, ensure adequate ventilation and gas safety checks. CO poisoning is a real risk in confined spaces.
- Electrical Safety: Brewing involves significant water and electricity (pumps, heating elements, fridges). All circuits must be RCD-protected, and equipment rated for damp/wet environments. A qualified electrician is essential.
- Ventilation: Boiling wort produces massive amounts of steam. Fermentation releases CO2. Excellent ventilation (extractor fans, open windows/door) is non-negotiable for safety and comfort.
- Waste Disposal: Spent grain (great for compost or animal feed!), hot break material, and chemical waste need responsible disposal. Check local regulations. Don’t pour strong chemicals or large quantities of organic waste down the drain.
- Structural Safety: Ensure your shed floor can handle the weight of filled fermenters (easily 100kg+ for 50L). Consider reinforcing if necessary.
Planning Your Shed-Brewery: Space, Layout & Services
Integrating brewing into an existing pub shed usually requires either:
- Dedicated Brewing Zone: Sectioning off part of the shed (using partition walls, heavy curtains, or shelving) for the messy, utilitarian brewing process.
- Brewing Annex: Adding a lean-to or small adjoining structure specifically for brewing, connected to the pub area.
- Converted Garage/Outbuilding: If space allows, using a separate nearby building.
Key Space Considerations:
- Workflow: Plan the “brewing journey.” Grain storage -> Mashing -> Boiling -> Cooling -> Fermentation -> Conditioning/Serving. Minimise lifting heavy liquids. Gravity is your friend – consider tiered stands.
- Essential Areas:
- Dry Storage: For grain (airtight containers!), hops (fridge/freezer), yeast, cleaning chemicals.
- Hot Side: Where mashing and boiling happen. Needs robust heat source (propane burner, electric element), ventilation, water supply, and drainage. Sturdy, heat-resistant surface.
- Cold Side: Where wort is chilled and transferred to fermenters. Cleanliness is paramount.
- Fermentation Space: Stable temperature control is VITAL. This usually means a dedicated temperature-controlled fermentation chamber (converted fridge/freezer with external thermostat) or a very well-insulated shed section with heating/cooling (expensive). Multiple fermenters need space.
- Conditioning/Serving: For real ale, casks (pins, 4.5gal, or firkins, 9gal) need to be stored cool (10-13°C) and stillaged/cellared properly before serving via your pub shed handpumps. This could be within the pub shed itself if temperature-controlled, or in a dedicated cellar space (under the shed? insulated cupboard?).
- Services:
- Water: Hot and cold water supply is essential. A dedicated brewing sink is a huge asset.
- Drainage: Robust drainage for hot liquor, spent grain rinsing, CIP waste, and spills. A floor gully is ideal.
- Power: Significant electrical demand for pumps, heating elements (if electric), fridges/freezers, lighting, ventilation. Dedicated circuits, RCD protection, and sufficient amperage are crucial. Consult an electrician.
- Ventilation: Powerful extractor fan(s) over the boiler, plus general air circulation.
Choosing Your Brewing System: Small-Scale Real Ale Focus
For the shed brewer aiming for traditional cask ale, systems prioritising quality and control over massive volume are key. Forget giant conical fermenters; think manageable batches (20-50 litres).
- All-In-One Electric Systems (The Shed Brewer’s Darling): Braumeister, Grainfather, Brew Monk, Brewzilla, etc. These integrate mashing, boiling, and often pumping into one compact unit. Highly efficient, programmable, safer (no open flame), and relatively easy to clean. Perfect for space-constrained sheds. Batch sizes typically 20-35L.
- Traditional 3-Vessel Systems: Mash Tun, Hot Liquor Tank (HLT), Boil Kettle. Offers maximum control and flexibility but requires more space, more equipment, and more cleaning. Can be built DIY using converted coolboxes (mash tun) and stock pots (HLT/Kettle). Gravity-fed or pumped.
- Brew-in-a-Bag (BIAB): The simplest entry. One large pot, a fine mesh bag. Mash and boil in the same vessel. Highly space-efficient and affordable, but efficiency can be slightly lower, and lifting the heavy grain bag can be awkward. Great for starting out.
Key Equipment Beyond the Brew Kettle:
- Fermenters:
- Plastic Buckets: Cheap, simple, but scratch easily and oxygen permeable over time. Good for starting.
- Glass Carboys: See the fermentation, impermeable to oxygen, but heavy, fragile, and light-sensitive (cover!).
- Stainless Steel Conicals/Dual Purpose (e.g., Fermentasaurus, SS Brewtech Bucket): More expensive, but durable, easy to clean, oxygen-impermeable, often have sampling/racking ports. Ideal for serious shed brewers.
- Temperature Control:This is non-negotiable for quality beer. Fermentation temperature dramatically impacts flavour. Options:
- Dedicated fridge/freezer + external thermostat (e.g., Inkbird). Most common and effective for sheds.
- Temperature-controlled fermentation chamber (built insulation + heating/cooling).
- Glycol chillers (overkill for most shed setups).
- Wort Chiller: Rapidly cools boiled wort to pitching temperature. Immersion (copper coil in wort) or counterflow (wort flows through tube inside cold water) chillers are essential.
- Cleaning & Sanitising Gear: Buckets, spray bottles, dedicated brushes, CIP pump (luxury but great). Star San or Iodophor are common no-rinse sanitisers.
- Transfer Pumps & Hoses: Food-grade pumps (e.g., small solar pumps) make transferring wort and beer much easier than gravity alone. Silicone tubing is best.
- Hydrometer & Refractometer: Essential for measuring gravity (sugar content) to calculate alcohol and track fermentation.
- Casks & Cellar Equipment (For Real Ale):
- Casks (Firkins 9gal, Pins 4.5gal): Traditionally wood, now mostly metal (easier to clean/maintain). Require thorough cleaning and steaming.
- Shives & Spiles: Wooden/plastic plugs for the top hole (shive) and soft/hard spiles for venting/conditioning.
- Keystones & Taps: For the tap hole.
- Stillage: Stand to hold the cask at a slight angle for serving.
- Handpump: The iconic beer engine for serving authentic cask ale. Needs connecting to the cask tap.
- Cool Cellaring: Space maintained at 10-13°C for cask conditioning and storage. An insulated cupboard with a temperature controller and small cooling unit (like an aircon unit) can work.
The Brewing Process (Cask Ale Focus): A Shed-Sized Overview
- Recipe Design: Start simple! A classic Best Bitter or Golden Ale. Choose quality UK malts (Maris Otter!), traditional hops (Fuggles, Goldings, Challenger), and a reliable yeast (Wyeast 1968 London ESB, White Labs WLP002 English Ale).
- Mashing: Mixing crushed grain with hot water (liquor) in the mash tun. Enzymes convert starches to fermentable sugars (approx. 60-70 mins at 65-68°C).
- Sparging: Rinsing the grain bed with hot water to extract all the sugary wort.
- The Boil: Bringing the collected wort to a rolling boil (60-90 mins). Add hops for bitterness (start of boil), flavour (middle), and aroma (end/flameout). Add finings like Irish Moss for clarity.
- Cooling: Rapidly chilling the wort to yeast-pitching temperature (18-22°C for ales) using the wort chiller.
- Transfer & Aeration: Moving cooled wort to a sanitised fermenter. Splash gently to introduce oxygen (vital for yeast health).
- Pitching Yeast: Adding the yeast! Seal the fermenter with an airlock.
- Fermentation: Yeast feasts on sugars, producing alcohol, CO2, and flavour compounds. Temperature control is critical! Primary fermentation usually takes 3-7 days.
- Conditioning (Cask Preparation):
- Racking: Transferring the bright beer (after primary fermentation and potentially a short secondary/diacetyl rest) off the yeast sediment into a sanitised and prepared cask.
- Priming: Adding a small amount of sugar (usually boiled in water) to the cask to create natural carbonation via secondary fermentation.
- Finings: Adding isinglass finings (traditional, derived from fish) or auxiliary finings to the cask to help yeast and proteins settle, creating a bright pint. Vegan alternatives exist.
- Sealing: Hammering in the shive and keystone. Leave the hard spile vent open initially.
- Cellaring: Storing the cask at 10-13°C for at least 7-14 days (often longer). Yeast consumes the priming sugar, carbonating the beer naturally. Finings work. Flavour matures and melds.
- Venting & Serving: Before serving, replace the hard spile with a soft spile to allow gentle venting. The beer is ready when a perfect creamy head forms and the flavour is balanced. Connect the handpump and pull your first glorious pint of your own real ale!
Costs: Investment vs. Pint Price
Be realistic. This isn’t cheap hobby territory anymore.
- Setup Costs:
- Brewing System: £300 (DIY BIAB) – £1500+ (Premium All-in-One)
- Fermenters + Temp Control (Fridge/Inkbird): £200 – £500
- Casks (2-3 needed for rotation): £100 – £250 each (used) / £200+ new
- Handpump: £150 – £400+
- Cellar Cooling Setup (if needed): £200 – £1000+
- Misc Equipment (Chiller, Pumps, Hoses, Chemicals, Testing): £200 – £500
- Total Initial Outlay: Easily £1500 – £4000+ for a functional setup capable of producing quality cask ale. DIY skills can reduce this.
- Ongoing Costs:
- Ingredients per Batch (20L): £20 – £50 (depends on recipe)
- Cleaning Chemicals/Sanitiser: £5-£10 per batch
- Gas (if propane burner): £5-£10 per batch
- Electricity: Increased usage (heating, cooling, pumps)
- Cost per Pint (Estimate): Ingredient cost alone for a standard bitter could be 50p-£1 per pint. Add equipment amortisation, energy, chemicals, and duty (if registered), and it might be £1.50-£3+ per pint. Still potentially cheaper than premium craft kegs, but the real value is in the creation and freshness. Remember Duty if registered!
The Intangibles: Passion, Patience, and Potential Pitfalls
- Time Commitment: Brewing isn’t quick. A brew day is 4-8 hours. Fermentation needs monitoring. Cellaring takes patience. Cleaning is constant.
- Learning Curve: Expect dud batches. Stuck mashes, infections, off-flavours (diacetyl, acetaldehyde), cloudy beer – they happen. Research, join forums (like The Home Brew Forum UK), learn from mistakes.
- Space Invasion: Brewing is messy and equipment-heavy. Your pristine pub shed aesthetic might need to compromise with utilitarianism.
- The Joy: Overcoming challenges, nailing a recipe, pouring that perfect first pint of your beer in your pub shed… it’s a feeling money can’t buy. The camaraderie of sharing it with appreciative friends is the ultimate reward.
Pulling the First Pint: The Dream Realised
Picture it: The fairy lights are twinkling, the firepit (safely distanced!) is glowing, and a hush falls over your pub shed regulars. You wipe down the handpump you installed yourself, connect it to the cask of “Shed Builder’s Best” that you mashed, boiled, fermented, and cellared just yards away. You pull the handle. A rich amber liquid flows, topped with a tight, creamy white head. You hold the glass aloft – a moment of pure pride. You take the first sip. It’s balanced, flavourful, fresh, and utterly unique. You hand it to your best mate. “Well? What d’ya reckon?” The grin on their face says it all. “Bloody hell, mate. You brewed this? It’s proper good!”
Conclusion: Is it Worth It?
Adding a small real ale brewery to your UK pub shed is not a casual undertaking. It demands significant investment, meticulous planning, a deep dive into regulations, relentless attention to cleanliness, technical learning, and unwavering patience. There will be sticky floors, steam-filled afternoons, and the occasional batch destined only for the compost heap.
But.
If you possess the passion for great beer, the DIY spirit, and the dream of creating something uniquely yours to share in your own backyard sanctuary, then the answer is a resounding yes. The satisfaction is profound, the freshness unmatched, and the experience of serving your own “Shed-brewed Special” to appreciative friends is the pinnacle of the pub shed dream. It transforms your shed from a drinking den into a genuine, albeit tiny, centre of craft and community. It’s about embracing the alchemy of malt, hops, water, and yeast, and turning your garden retreat into a source of liquid pride. So, if you hear the call of the mash tun echoing from your shed, do your homework, plan meticulously, embrace the challenges, and prepare to brew your way to pub shed nirvana. Cheers to your brewing adventure! Now, where did I put that hydrometer…?
Disclosure: This post may contain affiliate links. If you make a purchase via these links, shedblog.co.uk may earn a small commission at no extra cost to you.
Useful Links
- Your shed-related Company here: like an old-school Blogroll
- Allotment sheds
- Gym shed
- Watch Horror Movies in your shed
- Looking for a Solo Cruise
- Build your own shipping container home
- Powering the UK Garden Shed
- Become Self Sufficient on ¼ Acre
- ProstaVive – Powerhouse Prostate Offer
- Health & Fitness/Men’s Health
- Buy Barndominium Plans
- TedsWoodworking – Best Woodworking Site On The Internet
- How To Setup A Fully Equipped Small Woodworking Shop
- The Ultimate How-To Guide to Building a Tiny House
Support us via Paypal or Buy me a Coffee