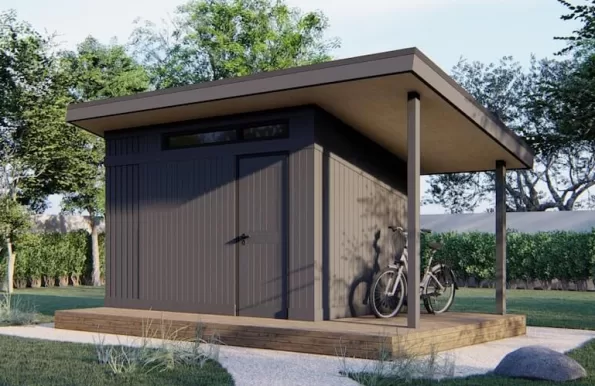
Transforming Your Garden Shed into a 5-Star Rabbit Palace with Omlet

If you are reading this, you likely agree with a fundamental truth of the universe: a garden shed is a terrible thing to waste. We’ve seen sheds transformed into pubs, home cinemas, pottery studios, and even home offices. But there is a growing trend in the shed community that warms the heart (and keeps the lawn trimmed): The Rabbit Shed Conversion.
Gone are the days when rabbits were relegated to a cramped, leaky hutch at the bottom of the garden, shivering through a British Winter. Today’s conscientious owners are moving their bunnies into walk-in sheds. It provides ample space for the rabbits, protection from the elements, and—crucially—it means you can feed them and clean them out without standing in the driving rain.
But as any seasoned Sheddie knows, you can’t just chuck a rabbit in a shed and call it a day. A standard timber building needs “modding” to be safe, secure, and suitable. And if you want to do it right, you combine your carpentry skills with the “Apple of the pet world”
Omlet.
Customers can use code NEWYEAR26 to get 20% off their basket (until the 12th of January)
Here is your comprehensive guide to blending traditional timber craftsmanship with Omlet’s modern engineering to create the ultimate rabbit residence.
Phase 1: The Shell – Insulation and Ventilation
Before we get to the fun gadgets and tunnels, we need to talk about the building fabric. A standard shiplap or overlap shed is essentially a wooden tent. In summer, it’s an oven; in winter, it’s an icebox. Rabbits are incredibly sensitive to heatstroke and respiratory issues, so climate control is priority number one.
The Insulation Job
You need to line the walls and the roof. We recommend rigid foam boards (like Celotex or Kingspan) fitted snugly between the framing studs.
- The “Sheddie” Warning: Rabbits are destruction testers in fur coats. If they can see it, they will eat it. You cannot leave foam insulation exposed. You must over-clad your insulation with plywood or MDF.
- The Finish: Paint the interior with pet-safe, water-based paint. White or light grey reflects light, making the shed feel bigger and helping you spot any cleaning issues immediately.
The Ventilation Paradox
If you insulate a shed, you trap moisture. Rabbit urine generates ammonia. This combination is dangerous. You need to install high-level vents (near the roof peak) to let hot, stale air out. Ideally, install a louvred vent on either side of the shed to create a cross-breeze without causing a draught at floor level where the bunnies sleep.
Phase 2: Flooring – The “Tanking” Technique
Standard shed floorboards (OSB or tongue-and-groove) are not designed for livestock. They will absorb moisture, harbour bacteria, and eventually rot. You need a floor that is waterproof and easy to sweep.
The Solution: A high-quality, non-slip vinyl or linoleum.
Don’t just cut it to the edge of the floor. Cut it 100mm (4 inches) larger on all sides and run it up the walls, creating a “skirting board” of vinyl. Glue it down and seal the edges with silicone. This effectively “tanks” the floor, meaning any spills or accidents stay contained and don’t soak into your timber frame.
Pro-Tip: Vinyl can be slippery for furry paws, which is bad for rabbit hips. Throw down some washable cotton runner rugs or heavy-duty rubber stable mats to give them grip.
Phase 3: The Omlet Connection – The Zippi Tunnel System
Now that the shed is safe, it’s time to make it fun. Rabbits need access to grass, but you don’t want to be carrying them in and out every day. This is where Omlet’s Zippi Tunnel System changes the game.
The Zippi system is a modular, flexible tunnel that mimics a natural burrow. It allows you to connect your shed to an outdoor run (or even an Omlet Eglu) situated metres away.

How to Install a Zippi Tunnel in a Wooden Shed
For us DIY enthusiasts, this is the best part. It involves power tools.
- The Kit: You need the Zippi Tunnel Single with Hutch to Run Connection Kit. This comes with a specific mounting collar designed to bolt onto flat surfaces (like shed walls).
- Location, Location, Location: Choose a spot on the shed wall low down—rabbits shouldn’t have to jump high to enter their burrow. Check the outside of the shed to ensure the tunnel will have a clear path to the grass.
- Check for Studs: Use a stud finder (or the “knocking” technique) to ensure you aren’t about to drill through a structural timber frame.
- The Cut: The kit comes with a template. Draw your circle. Drill a pilot hole. Grab your jigsaw and carefully cut the circle out of the shed wall.
- Sealing: This is crucial. Before you bolt the Zippi frame to the outside of the shed, apply a generous bead of clear outdoor silicone sealant to the back of the frame. This stops rain from driving behind the plastic and rotting the exposed end-grain of your cladding.
- The Connection: Bolt the frame tight. Connect the flexible Zippi tube. Now, your rabbits have a permanent, predator-proof door to the outside world.
You can lock the Zippi door from the inside of the shed or the outside, giving you total control over when they go out to play.

Phase 4: The Outdoor Run
You’ve connected the tunnel, but where does it go? You could build a DIY run with chicken wire and timber, but let’s be honest: chicken wire rusts, and foxes can chew through it.
If you’ve invested time upgrading the shed, pair it with an Omlet Zippi Run.
These are heavy-duty steel mesh runs that are modular. You can make them as tall or as long as you like. They even have “anti-tunnel” skirts (a mesh perimeter that lies flat on the grass) to stop foxes from digging in.
By connecting the Zippi Tunnel from the shed directly into a Zippi Run, you create a dual-environment setup.
- The Shed: The warm, dry bedroom and dining hall.
- The Run: The gymnasium and fresh air zone.
This setup is the “Gold Standard” of rabbit welfare. It allows them to express natural behaviours (running, grazing, burrowing through tubes) while keeping them safe from UK weather and predators.
Phase 5: Interior Furnishings and Storage
One of the joys of using a shed is the height. Rabbits love to survey their territory. You can use this to your advantage.
Platforms and Ramps
Build a few wooden platforms or shelves along the back wall. Use ramps (with grip strips) to let the rabbits hop up. This increases the usable floor area of your shed effectively. You can even integrate the Omlet Zippi Platforms, which are designed to fit inside runs but can easily be adapted for shed corners.

The Hay Station
Hay makes a mess. It’s a fact of life. To keep your shed tidy, look at the Omlet Hay Station. Unlike a wire rack that drops dust everywhere, these keep the hay contained and off the floor. Mount two or three of them on the shed walls at rabbit-head height.
Shed Storage (For Humans)
Don’t forget yourself! The upper half of the shed is yours. Install high shelving or cupboards to store:
- Bales of hay and straw.
- Cleaning supplies (dustpan, brush, disinfectant).
- Dried food and treats (in sealed tubs to stop mice).
- The Omlet Caddi Treat Holder (great for hanging greens so they don’t get trampled into the floor).
Phase 6: Security – Fort Knox
A shed is only as secure as its weakest point. A standard shed door usually comes with a turn-button or a flimsy hasp and staple. This is not enough. Foxes are clever, strong, and persistent.
- The Locks: Install a heavy-duty bolt (sliding bolt) and secure it with a padlock. Ideally, use two—one at the top and one at the bottom—to prevent the door from being warped or pulled open at the corner.
- The Windows: If your shed has glass windows, they are a weak point. If a fox smashes the glass, they are in. You must cover the inside of the window frame with strong welded wire mesh (16-gauge or stronger). This allows light in but keeps predators out even if the glass breaks.
- The “Pop Hole” Door: If you used the Zippi Tunnel, you are safe. If you cut a standard DIY cat-flap style door, ensure it has a metal facing. Rats can chew through wood doors easily.
Summary: The Best of Both Worlds
Converting a shed for rabbits is one of the most satisfying projects a Sheddie can undertake. It requires all the skills we love—insulation, flooring, joinery, and security—and results in a tangible improvement in animal welfare.
By integrating Omlet’s specialized rabbit products, particularly the Zippi Tunnel and Run systems, you bridge the gap between “DIY” and “Professional.” You get the sturdiness and aesthetic of your timber shed, combined with the predator-proof, hygienic, and modular engineering of Omlet.
Your rabbits get a warm, dry palace with 24/7 access to the garden. You get a tidy garden, happier pets, and—let’s be honest—a great excuse to spend a weekend in the garden with your toolbox.
Disclosure: This post may contain affiliate links. If you make a purchase via these links, shedblog.co.uk may earn a small commission at no extra cost to you.
Useful Links
- Your shed-related Company here: like an old-school Blogroll
- Allotment sheds
- Gym shed
- Watch Horror Movies in your shed
- Looking for a Solo Cruise
- Build your own shipping container home
- Powering the UK Garden Shed
- Become Self Sufficient on ¼ Acre
- ProstaVive – Powerhouse Prostate Offer
- Health & Fitness/Men’s Health
- Buy Barndominium Plans
- TedsWoodworking – Best Woodworking Site On The Internet
- How To Setup A Fully Equipped Small Woodworking Shop
- The Ultimate How-To Guide to Building a Tiny House
Support us via Paypal or Buy me a Coffee