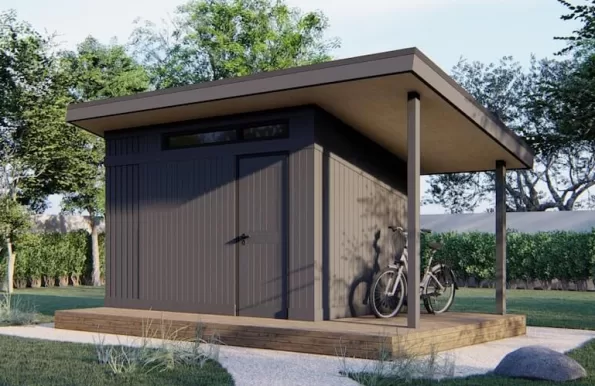
How to Drain Sunroof Rooflights on Your Shed and Winter Proof Your Outbuilding

This is mainly for our USA cousins but can apply to any building with a sunroof, even a FORD Cortina Mk2 Coupe
Keeping a shed rooflight free?draining before winter prevents leaks, damp, and freeze?thaw damage. This practical “sunroof how to” guide shows exactly how to clear a sunroof drain on an outbuilding or garden shed, then harden the building for the cold, wet months.
What you’ll need
- Stable ladder, helper if possible
- Non?slip footwear, gloves, eye protection
- Scoop/trowel, soft and stiff brushes, bucket or hose
- Exterior sealant and caulk gun, spare gutter clips/seals
- Wood preservative or microporous paint, sandpaper
- Weatherstripping, hinge/lock oil, desiccant packs
- Pest mesh, vent grilles, leaf guards, storage crates
- Trimmer line/cable tie for tiny drain holes, cloths/rags
Safety first
Work on a dry, calm day; place the ladder on firm, level ground and don’t overreach. Keep electrics off while working around cables or penetrations. If roofs are icy or very wet, postpone the job.
Step 1) Clear the roof surface
Sweep off leaves, twigs, moss, and grit so water doesn’t sit against felt, shingles, or metal. Avoid high?pressure washing that can lift felt or strip coatings. After storms and late leaf fall, repeat this quick clean.
Step 2) Unblock gutters and downpipes
Scoop out debris and flush from the high end with a bucket or hose until water runs freely. Reseat joints and replace perished seals; adjust brackets to keep a slight fall toward the outlet. If you lack guttering, consider a simple run directed to a water butt or soakaway.
Step 3) How to drain sunroof rooflights (sunroof drain focus)
- Locate the rooflight’s perimeter channels and tiny weep/“sunroof drain” holes at the frame edge.
- Brush out visible debris and vacuum gently if accessible.
- For clogged weeps, use a flexible plastic tie or trimmer line to ease out blockages; don’t enlarge holes.
- Rinse lightly with clean water to confirm flow; this is the quickest “sunroof how to” check you can do.
Step 4) Reseal the rooflight perimeter
Inspect flashing, frame corners, and gaskets for cracks or UV damage. Reseal with exterior?grade sealant compatible with your roof covering (felt, EPDM, GRP, metal). Replace crazed lenses or tired gaskets. Repair any soft or sagging deck timber before sealing.
Step 5) Verify roof falls and eliminate ponding
Do a flush test from the high side toward gutters and around the rooflight frame. If water lingers, correct gutter falls, re?bed low spots, or add tapered battens under new felt/EPDM to restore pitch. Patch small defects with compatible systems; widespread ponding suggests re?roofing.
Step 6) Control where rainwater goes
Fit or repair gutters to stop splashback soaking walls. Extend downpipes to drains, gravel soakaways, or a water butt. Keep a 150 mm gravel skirt around the base so water sheds away instead of soaking cladding and the foundation.
Step 7) Weather?seal the envelope
Patch tears, re?adhere lifted edges, and replace worn felt or cracked shingles. Seal door/window gaps and add weatherstripping. Clean, dry, then treat exterior timber with preservative or microporous paint, paying attention to end grain and cut edges.
Step 8) Ventilate without drafts
Vent high and low to purge moist air while keeping rain and pests out. Clear cobwebs and ensure vents have mesh. If the space is insulated or heated, add a vapour control layer and maintain airflow to prevent condensation.
Step 9) Protect interior and contents
Raise items off the floor on pallets or shelves. Use lidded crates for tools and electronics, adding desiccant packs. Oil locks, hasps, hinges, and sliding tracks. Keep a door mat to reduce tracked?in moisture.
Step 10) Security, power, and safety checks
Test exterior lighting and sensors. Check RCDs, examine cables, and seal penetrations. Consider smoke/heat alarms if you store fuels or use heaters. Keep the appropriate fire extinguisher accessible.
Step 11) Pest?proofing
Seal gaps larger than a pencil with filler or mesh. Fit bristle strips at door thresholds. Store seeds and feeds in metal tins with tight lids. Inspect eaves and vents for nests and clear responsibly.
Step 12) Winter rota
After heavy leaf fall or storms, recheck the rooflight sunroof drain, gutters, and downpipe outlets. During freezes, watch for ice dams and clear what you safely can. After snow, remove weight from ridges and around rooflight frames first.
Winter shed and rooflight checklist
Tools and PPE
- Ladder and helper
- PPE: gloves, eye protection, non?slip footwear
- Brushes, scoop, bucket/hose
- Exterior sealant, spare gutter clips/seals
- Preservative/paint, sandpaper, rollers/brushes
- Weatherstripping, oil, desiccant packs
- Pest mesh, vent grilles, leaf guards, storage crates
- Trimmer line/cable tie for sunroof drain holes
Roof and rooflight
- Sweep roof clear of debris
- Inspect felt/EPDM/shingles; patch or replace
- Clear rooflight perimeter channels and sunroof drain weep holes
- Reseal flashing and frame if cracked/gapped
- Flush?test the roof and rooflight drainage
- Correct ponding via falls, taper, or re?roofing
- After snow, clear heavy loads promptly
Gutters and downpipes
- Remove debris and flush end?to?end
- Reseat joints; replace seals and clips
- Adjust bracket falls toward outlets
- Fit leaf guards under trees
- Add gutters if none exist; direct to water butt/soakaway
Drainage and base
- Maintain 150 mm gravel skirt around base
- Regrade soil away from walls
- Install/maintain a French drain if boggy
- Extend downpipes to drains/soakaways
- Check base for settlement or wash?out
Walls, doors, and windows
- Clean, dry, and treat exterior timber
- Seal end grain, sills, and cut edges
- Replace cracked glazing beads/gaskets
- Add weatherstripping to doors/windows
- Recoat finishes where needed
Ventilation and condensation
- Fit/clear high and low vents with insect mesh
- Air the shed on dry days
- Pair insulation with a vapour control layer
- Use desiccant in storage boxes
Interior and storage
- Declutter and raise items off floor
- Use lidded, stackable crates
- Protect electrics from drips; tidy cables
- Oil padlocks, hinges, tracks
- Add door mat
Security, power, and safety
- Test lights, sensors, and RCDs
- Inspect cables and weatherproof penetrations
- Fit smoke/heat alarms if applicable
- Keep the right extinguisher accessible
Pest control
- Seal gaps with filler/mesh; add door bristle strip
- Store feeds/seeds in metal tins
- Check eaves, vents, corners for nests
- Remove cobwebs and wasp remnants
Winter rota (repeat)
- Post?leaf fall: gutters, rooflight sunroof drain, downpipes
- After storms: fixings, felt edges, flashing
- During freezes: watch/clear ice dams safely
- After snow: clear ridge and around rooflight first
Disclosure: This post may contain affiliate links. If you make a purchase via these links, shedblog.co.uk may earn a small commission at no extra cost to you.
Useful Links
- Your shed-related Company here: like an old-school Blogroll
- Allotment sheds
- Gym shed
- Watch Horror Movies in your shed
- Looking for a Solo Cruise
- Build your own shipping container home
- Powering the UK Garden Shed
- Become Self Sufficient on ¼ Acre
- ProstaVive – Powerhouse Prostate Offer
- Health & Fitness/Men’s Health
- Buy Barndominium Plans
- TedsWoodworking – Best Woodworking Site On The Internet
- How To Setup A Fully Equipped Small Woodworking Shop
- The Ultimate How-To Guide to Building a Tiny House
Support us via Paypal or Buy me a Coffee